Code along video
Learning objectives
In this lesson, we will write our first program in Go, which prints the message “Hello, world!” to the console. This program may seem simple, but it is the classic start to any programming course and represents a significant first step in our journey to learn how to code.
To write our first program, we will need to learn how to download Go and install a text editor that will make working with Go easy.
Code along summary
Setup
Before writing our first program, you should perform the following two installations:
- Download and install the Go programming language at https://go.dev/doc/install.
- Download and install a text editor. We suggest the integrated development environment Visual Studio Code, which can be downloaded from https://code.visualstudio.com.
Identifying the GOPATH
Once you have installed Go and VS Code, open a command line terminal.
- In Windows, search for
cmdfrom your start screen. This should bring up the “Command Prompt” app as a suggestion. Click to open the app. - In macOS, open the Terminal app, which is contained in
Applications > Utilities.
In the terminal, execute the following command by typing it and pressing return.
go env
After a moment you will see quite a few lines printed to the console, which contain various parameters about the inner workings of Go. This is mostly far more advanced than anything we will do in the course, but we want you to take a look at one line.
Scroll up in the terminal window until you see a line beginning with GOPATH. On my computer (macOS), the line says GOPATH='/Users/phillipcompeau/go'. On a Windows machine, it might be something like GOPATH=C:UsersYourUsernamego.
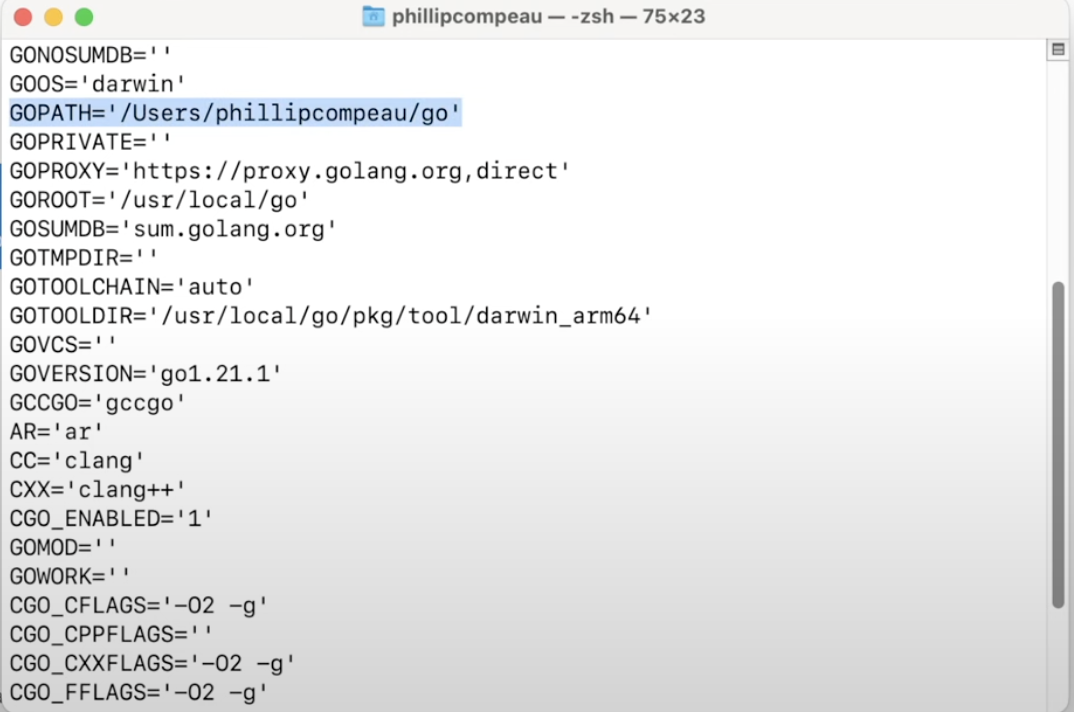
The GOPATH variable tells us where we should place our Go code so that Go knows where to look. We will use this information to establish a code directory shortly.
Turning off modules
Go has a nice feature called “modules”; they allow developers to build large projects with many different pieces of code that work together. This feature is turned on by default, but we have found that it can prove challenging for beginning work in Go. As a result, we will turn off the modules feature.
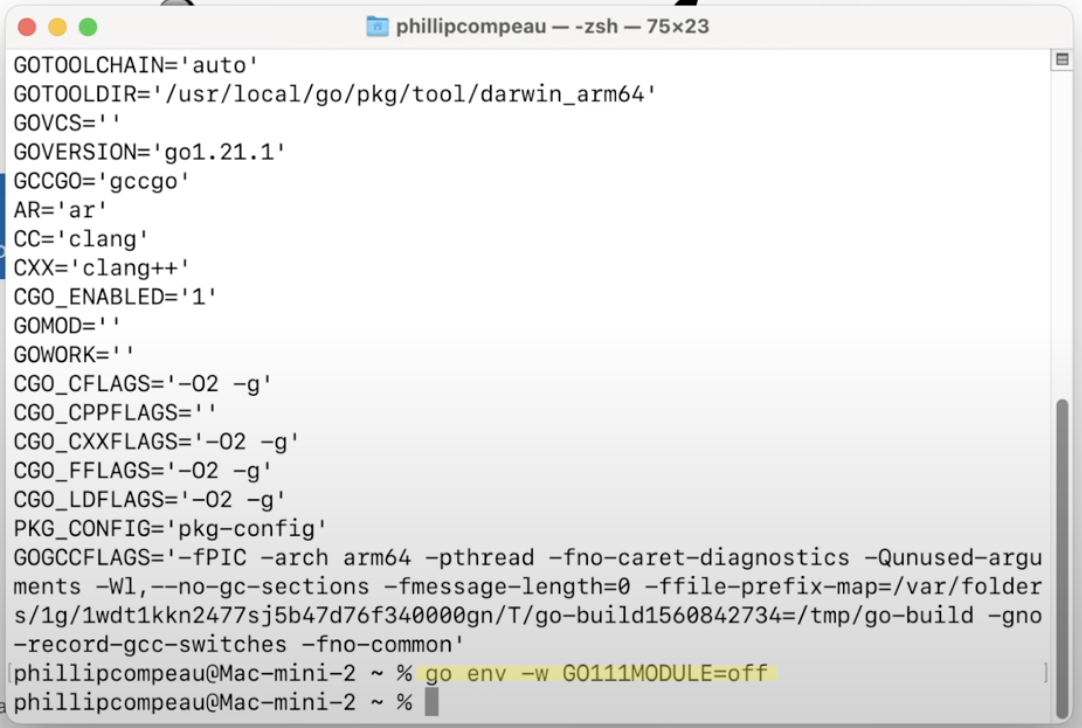
To do so, execute the following command in the terminal.
go env -w GO111MODULE=off
If you receive no feedback in the terminal window, then the command worked.
Opening VS Code and establishing a code directory
Open VS Code. On the left side of the page, click “Open Folder”.
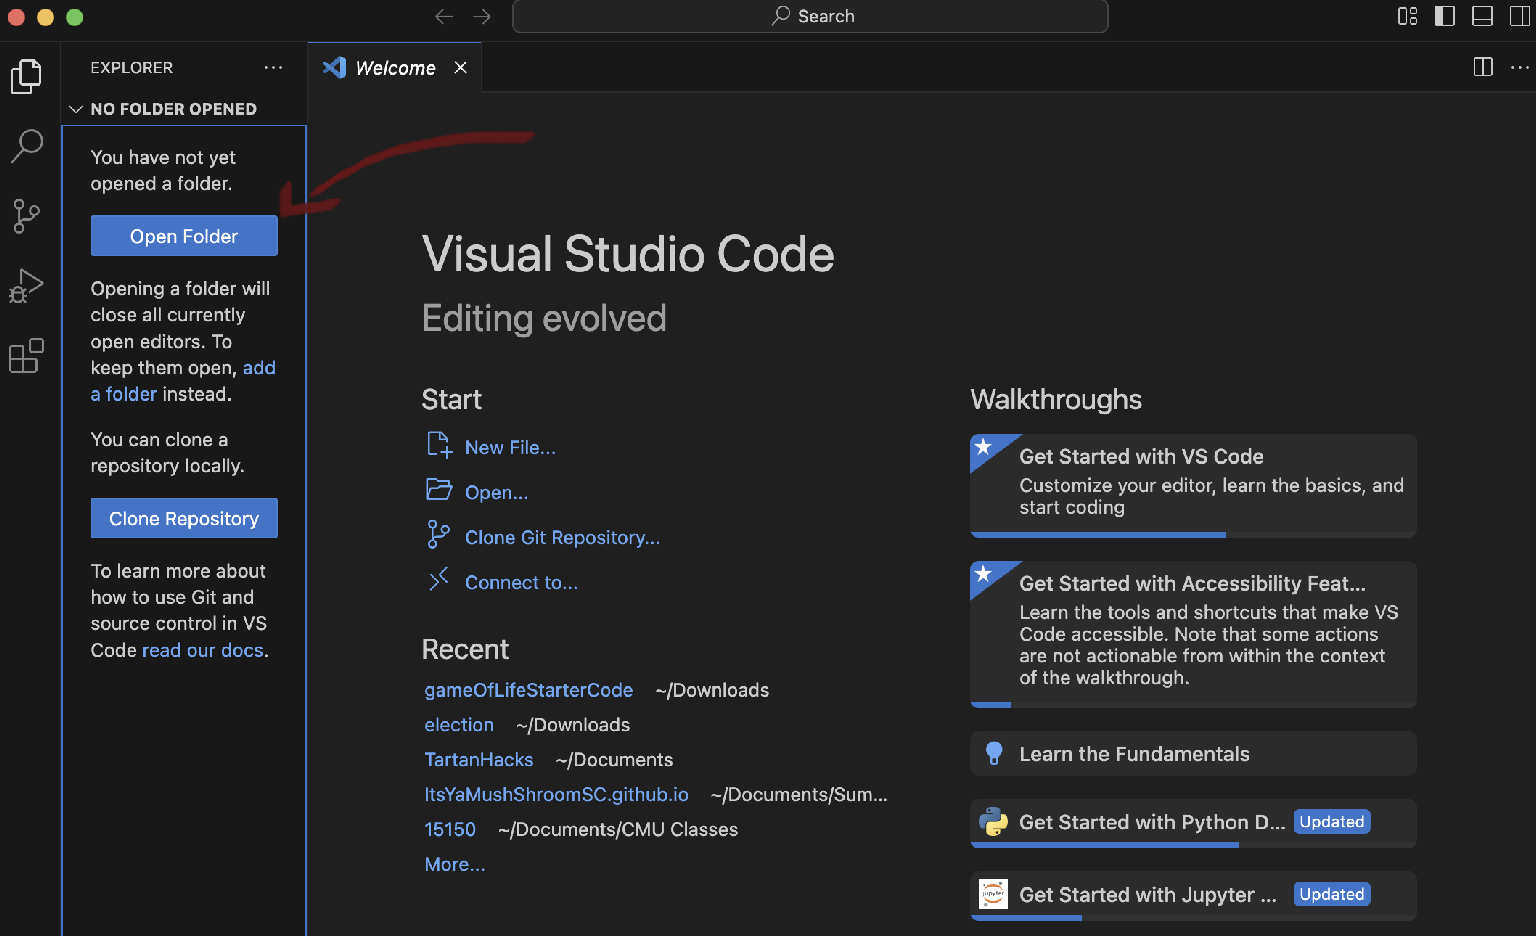
The window that opens on my computer defaults to my /Users/phillipcompeau home directory. Even though we know from our work above that my GOPATH is /Users/phillipcompeau/go, the go subdirectory does not exist. Create a new folder called go.
Note: The screencaps provided below all use macOS, but the process is similar in Windows.
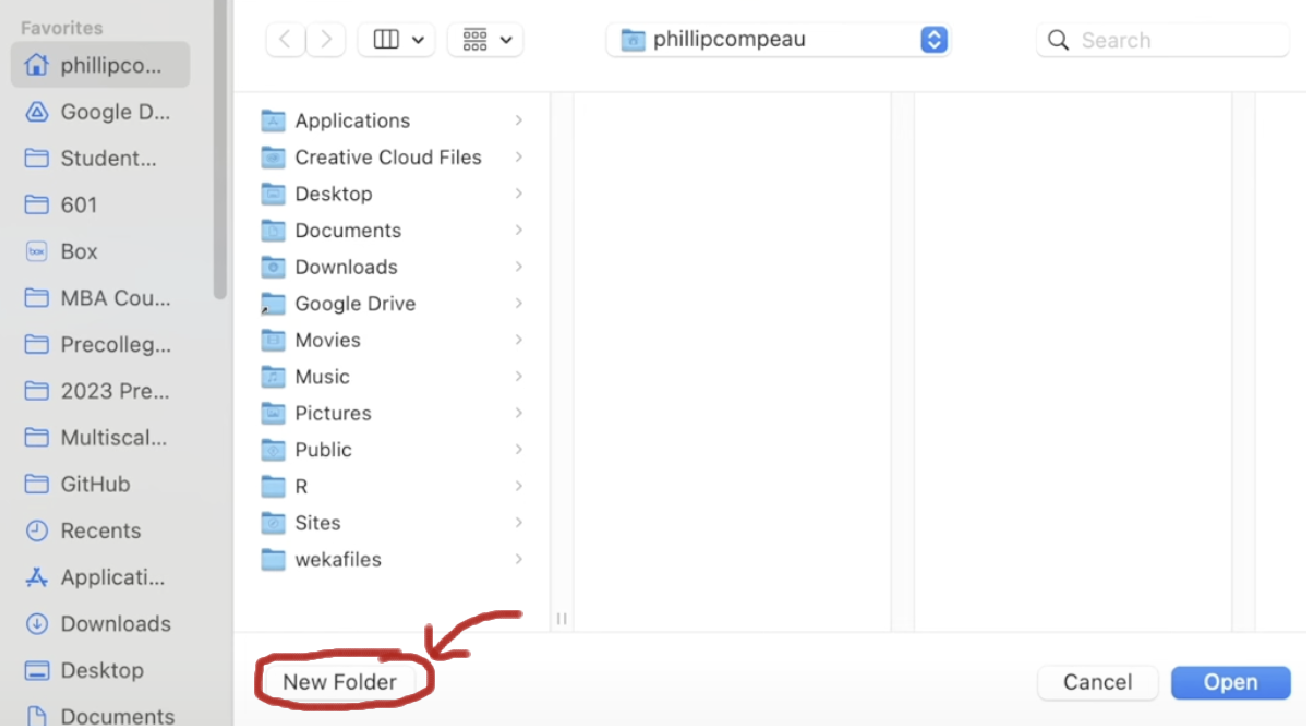
After creating the go directory, click “Open”, which will set your workspace to be the go folder.

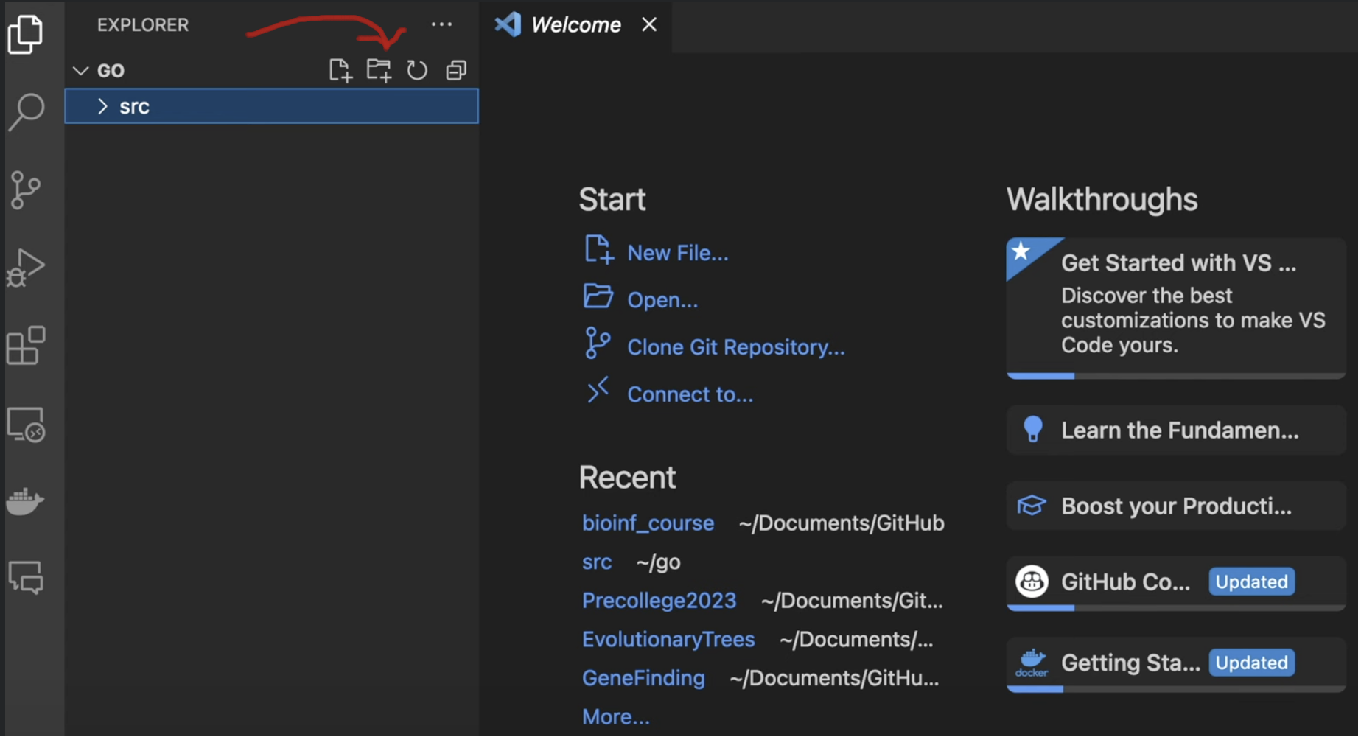
On the left side of your VS Code window, you will see the go folder shortcut appear. Next to this folder, click the folder button to create a new subdirectory of go. Name the new folder that you created src. This is where we will place our source code for this course.
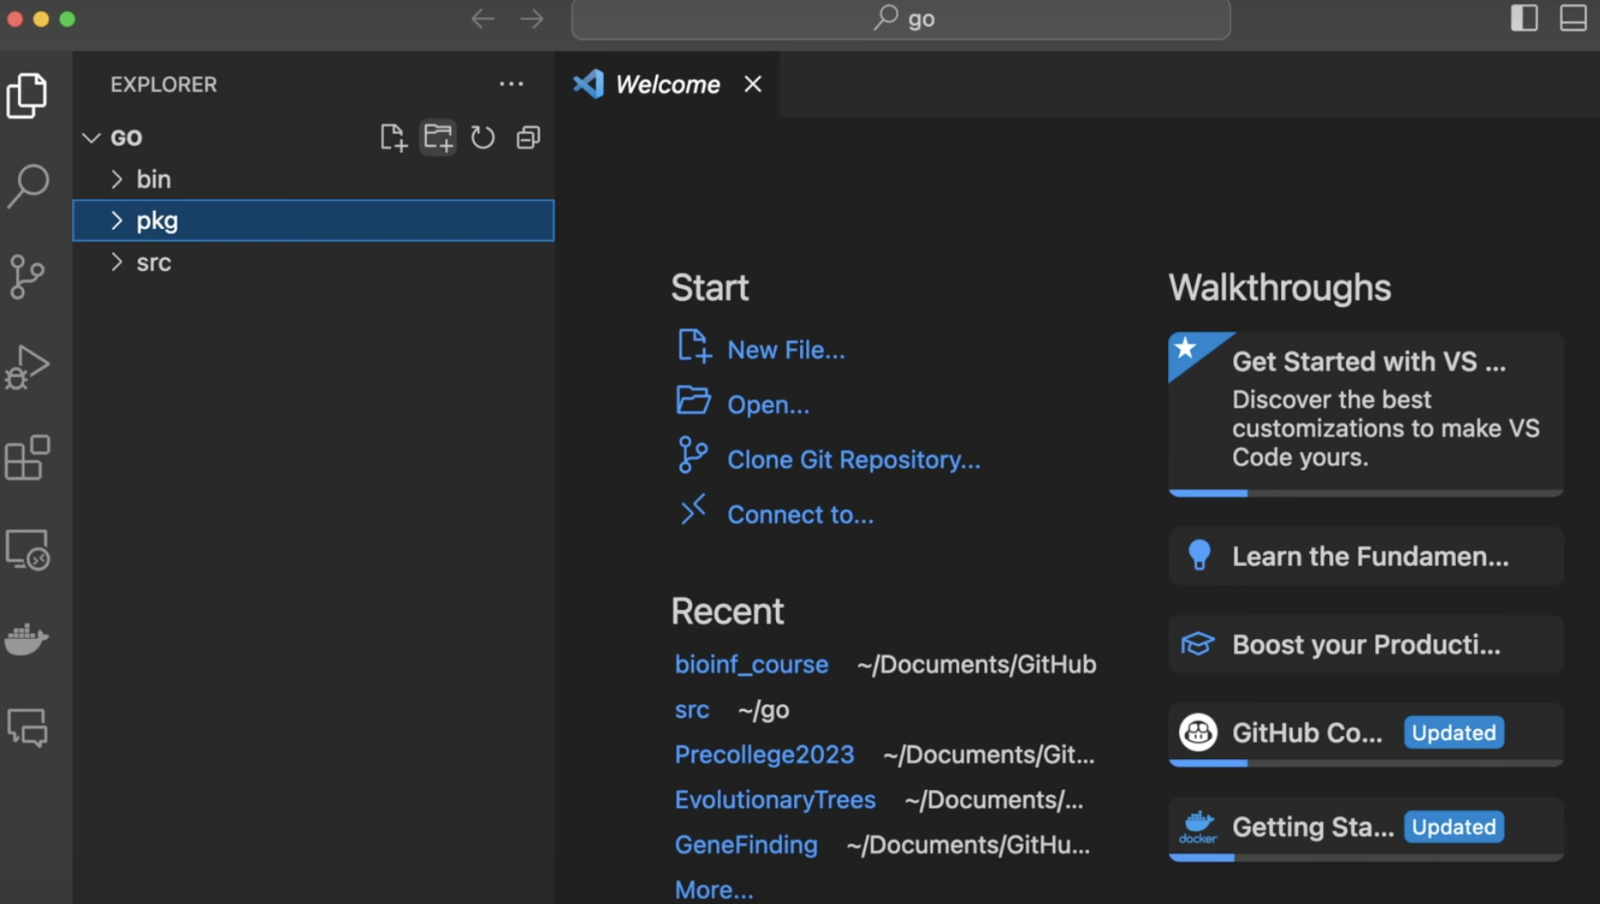
Next, create two more folders inside go: bin, which will contain executable programs that we write, and pkg, which will contain pre-compiled source code that we can re-use.
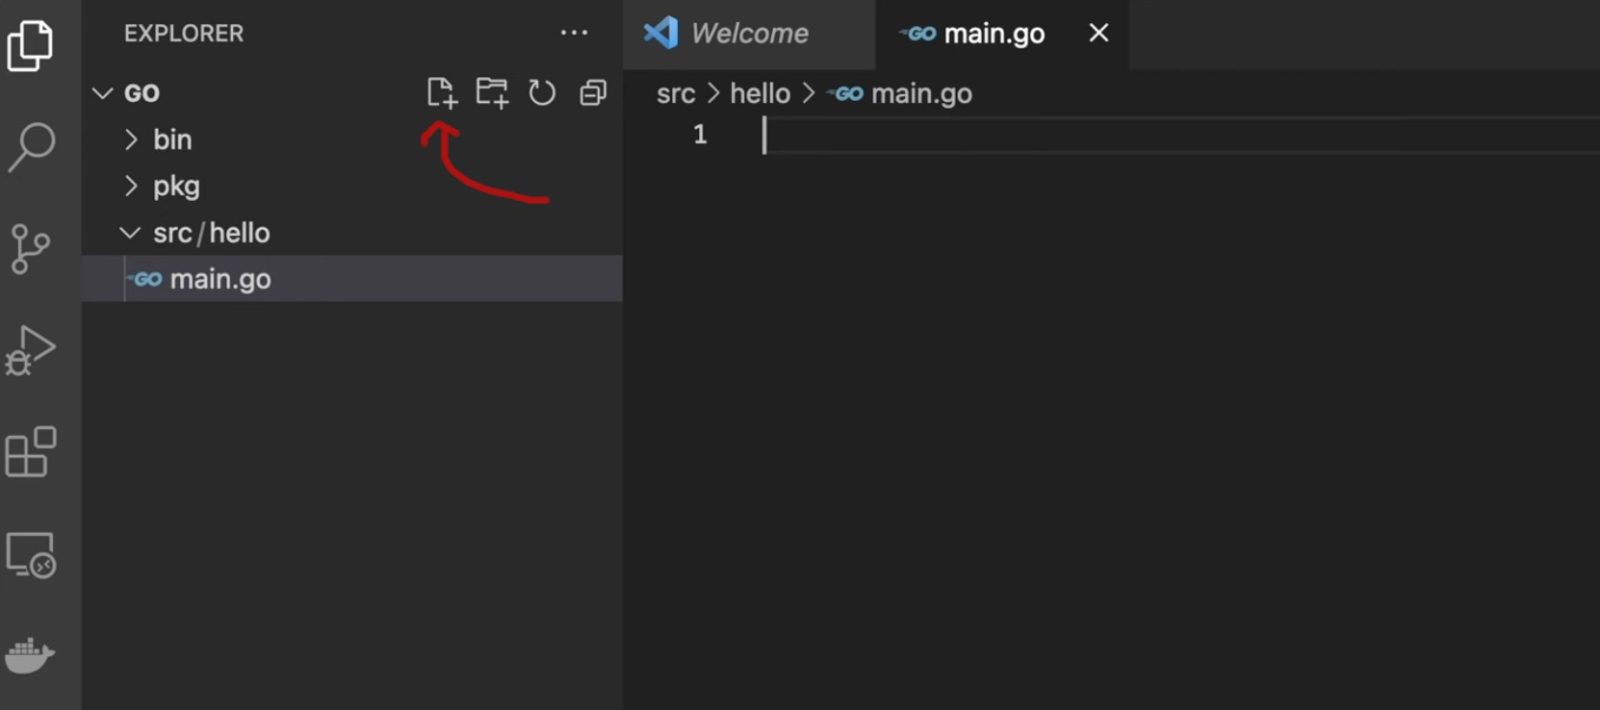
Finally, make a subfolder of src, and name it hello. Then, create a new file in the hello directory called main.go. This file, which will contain our “Hello, world!” program, is a plain text file, but the .go extension indicates that this file will contain code in the Go programming language.
Installing the Go extension for VS Code
We are nearly ready to write our program, but we need to perform one additional installation. Technically, this installation isn’t required to run Go code, but it will make working with Go code even easier.
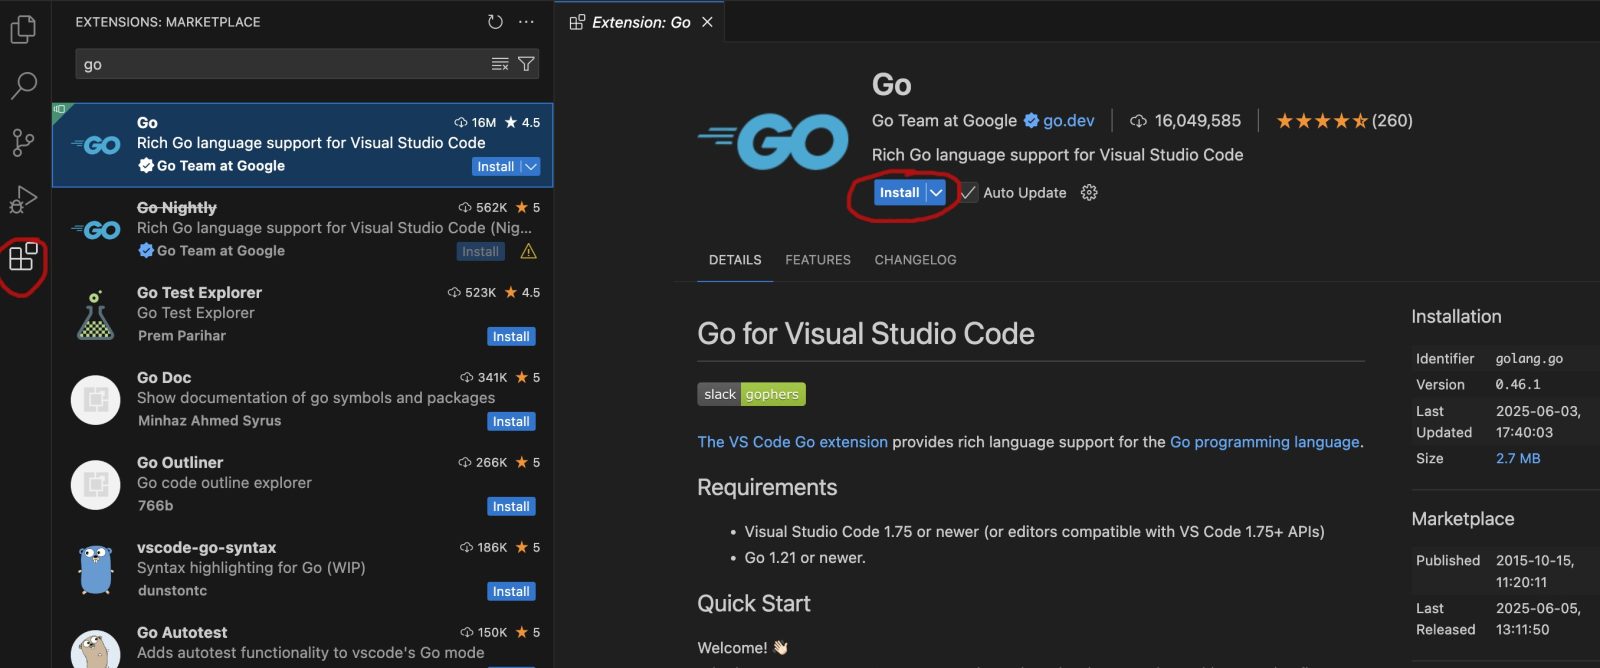
In VS Code, click the “extensions” tab on the left side of the screen, which looks like a square getting added to a block of three squares. (An extension is an add-on program that provides additional features.)
Then, in the extension search bar, type go. The top result should be an extension named Go. Beneath it, click the button that says Install. This extension will provide code highlighting in addition to some other features like code suggestions.
Writing our “Hello, world!” program
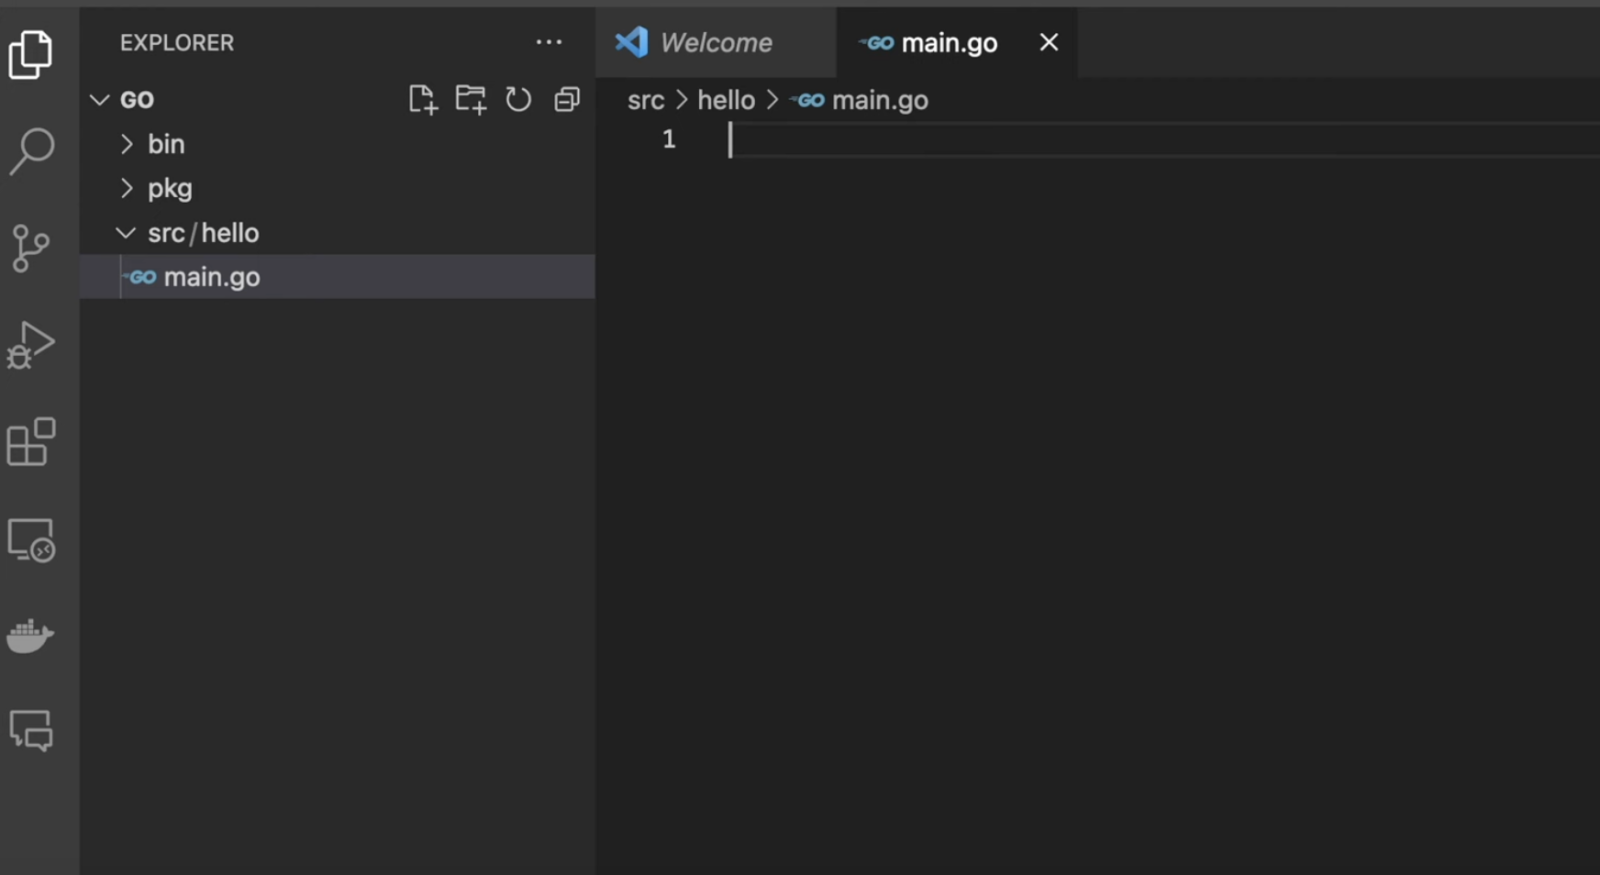
Close any pop-up messages from VS Code, and click the file icon on the left tab to bring up the file explorer.
You should see the main.go file that you created in your center window. We will type our program in this file.
First, type the following line at the top of the file. This indicates to Go that the code contained in this file will be executable (i.e., we will run this code as a program instead of having it as helper code for another program.)
package main
We are going to be printing a message to the console, a task that will require us to import some code from a repository of prewritten code called a package. The package that we need to import is called "fmt"main.go should look as follows.
package main

import (
    "fmt"
)
The part of our code that we will run must go into a block of code called func main(). The block is also contained within curly braces, as follows.
package main

import (
    "fmt"
)

func main() {

}
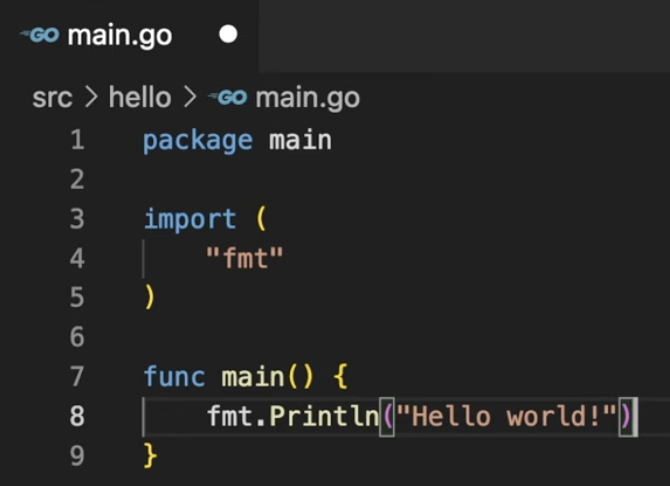
Now we just need to add our print statement to func main(). To print a message on a single line, we use the function Println() from the fmt package. (We will say more about functions in the next code along.) In particular, we use the command fmt.Println() and place the message to print inside quotation marks within the parentheses.
package main

import (
    "fmt"
)

func main() {
    fmt.Println("Hello, world!")
}
Before continuing, the most important thing that we need to do is save our code. A solid white circle at the top of main.go indicates that your code is not saved.
Save your code, which will remove the solid white circle.
Navigating using the command line
We will run our program in the command line terminal. Open a terminal window if you do not already have one open from our previous steps on determining GOPATH and turning off modules. When you look at the terminal, you will likely see your home directory appear at the left side of the window. For example, the current line in my terminal window shows phillipcompeau@Mac-mini-2. This indicates that the terminal considers its present working directory to be my home directory, /Users/phillipcompeau.

We already know that our Go code is contained within a go/src directory that lives inside of this home directory. So, how can we navigate there in the terminal application?
First, execute the following command. The cdgo directory.
cd go
We know that we are currently within the Go directory because the start of the current line will show the home directory followed by go. On my computer, it shows phillipcompeau@Mac-mini-2 go.

The cdcd ..
cd ..

We now want to navigate into the directory that contains our program, which is go/src/hello. We could do this by executing three separate commands: cd gocd srccd hellocdgo/src/hello.
cd go/src/hello
You should now see the word hello appear in the command line next to your username to indicate that the navigation was successful. On my computer, the terminal shows phillipcompeau@Mac-mini-2 hello.

Before we run our program, we will point out two additional helpful terminal commands. The command pwd/Users/phillipcompeau/go/src/hello.
pwd

We also can execute a command to indicate the contents of the present working directory. On macOS, the command is ls
ls

On Windows, the equivalent command is dir
dir
Compiling and running our program
To run our program, we first need to compile our code, which converts the program into an executable file that your computer can run because the program is broken into a collection of simple instructions that can be processed as changes in charge to tiny semiconductor switches in the computer. In a later chapter, we will explain what all this means. For now, think of the compiling process as a grammar checker that ensures your code can be safely converted into an executable file.
Assuming that you followed the steps in the previous section to navigate into go/src/hello, execute the following command in the terminal to compile all Go code in the current folder. The go keyword indicates that we are performing a task with Go, and the build command serves to compile the code.
go build

Now that we have compiled our code, let’s see the contents of the current go/src/hello directory using the ls command (macOS) or dir command (Windows).
We see that go/src/hello now contains two files: our main.go text file as well as a new executable file. On macOS, this file is called hello; on Windows it is called hello.exe. Note that the file inherits its name from the parent folder.

Let’s execute a command to run this code. On macOS, the prefix ./ indicates that we are running the file indicated afterward.
./hello
On Windows, we execute a command indicating the name of the executable file.
hello.exe

Regardless of what operating system we are using, we obtain the same result: the message Hello, world! printed to the console.
Shortcut: running code within VS Code
At the bottom of the VS Code window, you will notice a tab named Terminal. Click on this tab, which will show a command-line interface. Because we set our VS Code home directory to the go directory inside our home folder, the VS Code terminal will default to having this directory as the present working directory.

As a result, we can repeat the above steps to run our program within VS Code. First, navigate into the appropriate subfolder.
cd src/hello
Then, compile and run your code with the go build compile command, followed by either ./hello or hello.exe depending on your operating system. You will once again see Hello, world! printed to the console, this time from within the comfort of VS Code.


You did it!
Congratulations on building your first program! This is one of the hardest things to do in programming, and it’s all downhill from here. You are now ready to start learning the basics of Go in the next lesson. Happy coding!
And if you would like to run this program in the browser, check out our sandbox below. We’ll be providing sandbox links throughout our coding challenges.